Showing posts with label Easter. Show all posts

Vintage: Raspberry Tapioca Sunset


My niece found this refreshing dessert in her Great Grandmother's recipe book from 1938, Miss Dine About Town, Marvelous Meals with Minute Tapioca.


You can find the Raspberry Tapioca Sunset recipe on page 18, under Matinee Luncheon in Miss Dine About Town, Marvelous Meals with Minute Tapioca.

Its has only six ingredients plus water.


It calls for Sugar, Tapioca, Salt, heavy whipping cream, Lemon juice, and water. 


And Fresh Raspberries!


You add the fresh crushed berries and lemon juice to the hot tapioca mixture after it comes to a boil.  


Once it cools down you pour the mixture about 1/3 in to each of your serving dishes and Chill. Saving the remainder of the mixture to fold in your whipped cream and chill. Once chilled you add the tapioca and whipped cream mixture on top and top with whipped cream and garnish with some fresh raspberries.  
I picked up these cute mini cups and spoons at my local dollar store. 


Bottom layer is the raspberry tapioca, next is the raspberry, whipped cream tapioca, topped with fresh whipped cream and berries!


This vintage recipe is a refreshing, not-too-sweet dessert you're going to love. 
I would serve this for Easter, Mother's Day or even a spring brunch.

Don't discard those old recipe books without checking them out. I overlooked the black and white photo (yes, I eat with my eyes) my niece pointed it out  while going through her great grandmother's books.  

Let me know if you have this vintage cookbook in your family cooking library. 
Have you tried any of these vintage treasures? 

Maggie


 -

Marshmallow Easter Eggs


 Once again I've fallen back to an old family cook book for these Marshmallow Easter Eggs. I pulled out my mothers Farm Journal Homemade Candy book.  


This recipe only called for 5 ingredients which our pantry did have. I even found some left over Easter paper cups and sprinkles!   


Marshmallows call for: 

2 tablespoons cold water
1/2 cup boiling water
1/2 cup sugar
1/2 teaspoon salt
1/2 teaspoon Vanilla 
Chocolate or Wilton Candy melts

1 Egg (use as a mold) 
Food coloring (optional)
Candy sprinkles (optional)


Add gelatin to a double boiler, then add the cold water. Once the gelatin has soften add the boiling water and mix, now slowly add the sugar, salt stir until its completely dissolved.  Then pour gelatin mixture in to your electric mixing bowl and whip on high speed until its thick and airy.  Now add the vanilla and food coloring continue to mix.  
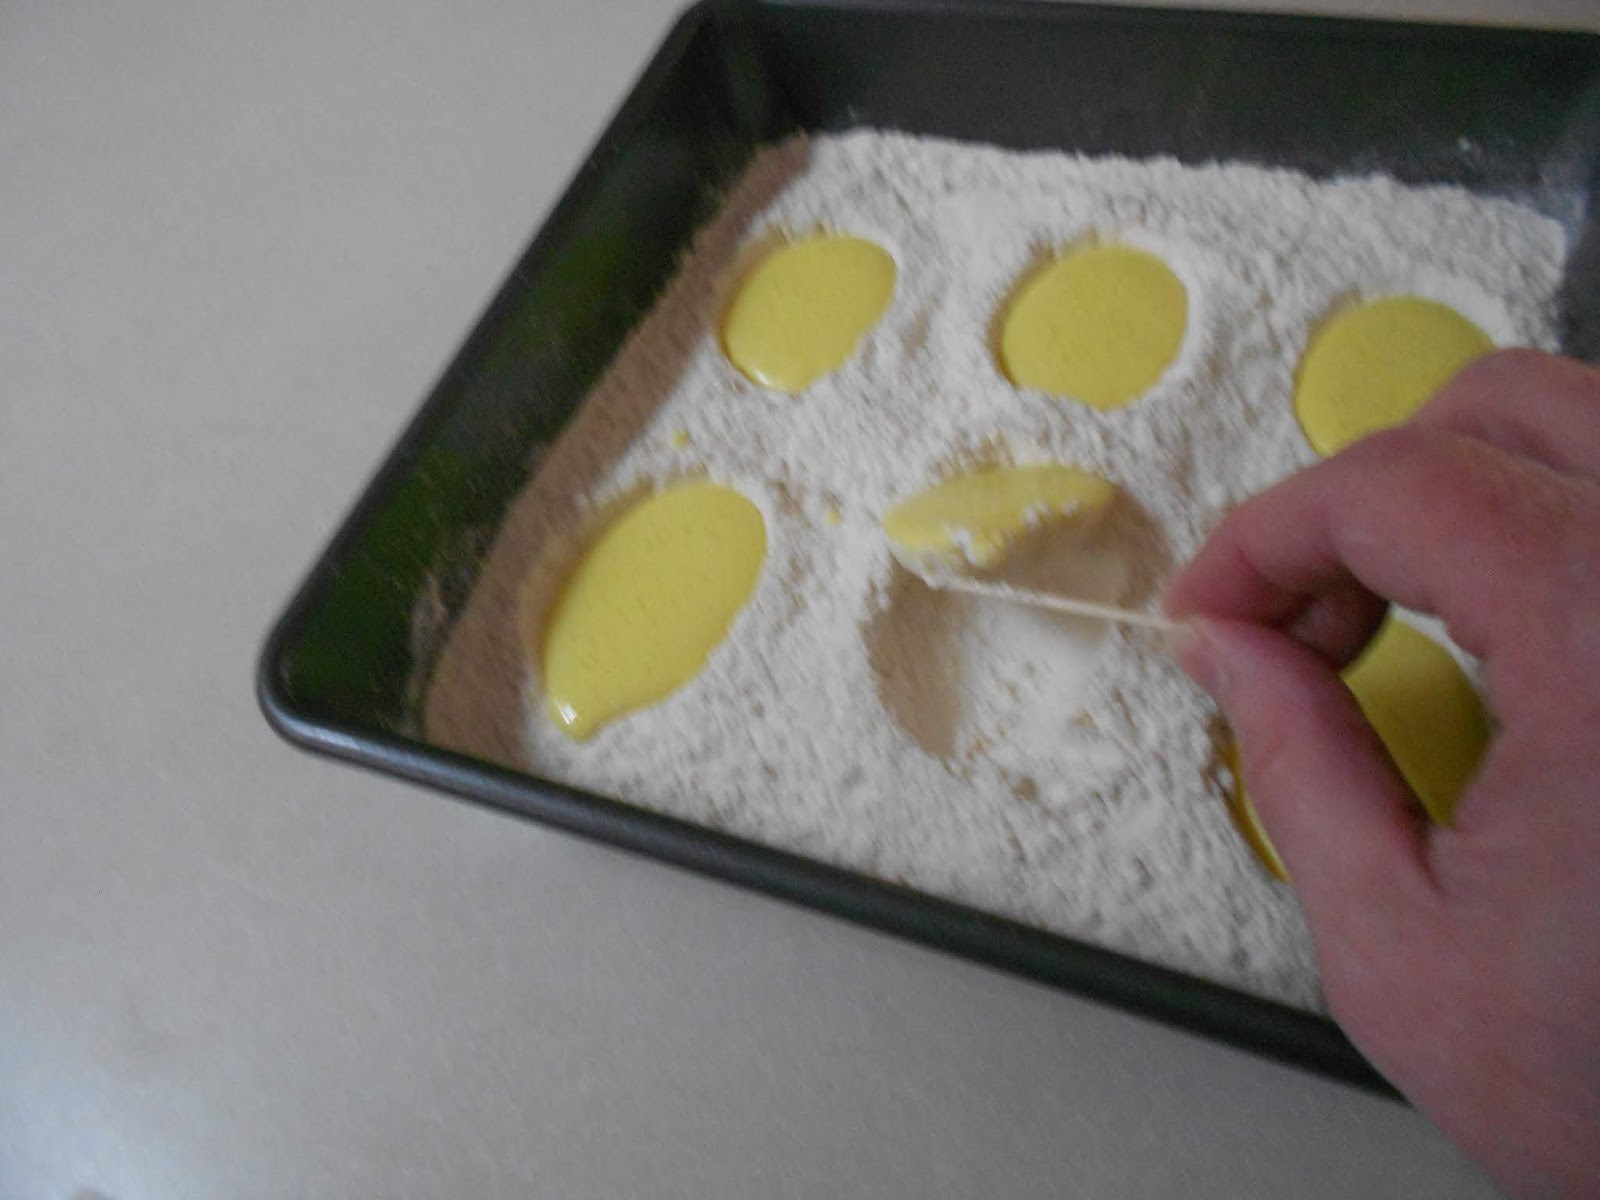
While waiting on the gelatin to mix let's make the egg mold.  Add 1" to 2" of flour to a small rimmed pan. Take your egg in shell I place mine in a small plastic bag to keep from contaminating the flour. Or if you have any plastic Easter eggs you could use one of those.   I didn't think of that until now.  


Push your egg in to the flour, space the eggs at intervals. 


This will be your egg mold, 


Next ladle your Marshmallow mixture into your flour Easter egg mold.  Don't worry if some of your mixture over runs, you can trim it once it sets up. 


Set in a cool dry area and let set up over night. 


I only made 6 half eggs since I didn't want use my pantry of flour.  The rest of the mixture I poured in 1/4 size cookie sheet that I sprayed with cooking spray.  At this point you can add candy sprinkles. Then set aside in a cool dry area to set up over night.  


The next day I used a tooth pick to see how firm they were. 


Once I removed them and brushed them off with a pastry brush and used a pizza cutter to trim my eggs of any over flow tails.


For the eggs, in a small microwave safe bowl add your chocolate or candy melts. Melt at 10 second intervals in the microwave, stir each time. 
Once melted dip a half egg in or sandwich the two half's together. 


Once coated cool in the refrigerator to set up faster. You can drizzle with a different color candy melt or add sprinkles before setting up in the refrigerator.  

For the cookie sheet marshmallows, flip out on a floured surface. 


Dust lightly with powder sugar. 


I found some Easter/Spring cookie cutter for some fun Marshmallows.  


Use your cookie cutters as you would for cookie dough on your marshmallows.  Keep in mind that your Marshmallow will be sticky.  For each cut out I would dip the cutter in my left over flour from my egg mold.  


Set your shapes a side to let the cut edges dry, 15 to 20 minutes, depending on how humid your weather is.


 For eyes I found some mini chocolate morsels.  


I found some Easter boxes and cups I was going to use for the church spring bake sale, but was canceled. Ill be dropping these off to my niece and nephews since it's looking like we wont be getting together due to Covid-19.  

Happy Easter Everyone!
Be Safe!
#WeAreInThisTogether


Bunny Tail Treats


 Since the first day of March I've had my nose pressed to the window looking for signs of spring. Alas, it's Michigan; we've had three days of snow.  Finally, my patience paid off.  I'm happy to report that our spring flowers are poking out of the ground with a few blooming in the sunshine now.  Our neighborhood wildlife is on the move and visiting our yard.  Among them are a few bunny families, which inspired me for these Bunny Tail Treats for Easter.

Bunny Trail Treats
You'll need:
#Lindt White Chocolate Truffles
#OreoThins Cookies "Mint"
Mini Marshmallows
#Wilton Green Candy Melts
Pink Sanding Sugar
Pink or red food coloring
Food safe paint brush
Shallow microwavable bowl
Wax paper
Food safe scissors
Wilton pre-made flowers
#Cadbury mini eggs


Start with the mini marshmallows and food safe scissors; you will be cutting three types of marshmallow shapes and sheet of wax paper.  The first part of your bunny tail treat is the tail.  You're going to begin by rolling your mini marshmallow between your fingers to give it the soft rumpled look of fluff.  Not too long: you don't want a sticky tail.  Once you have the look you want cut the ball in half and set aside with the sticky side down on the waxed paper, this gives you two tails.  (Do this for each bunny tail you are making).


Next, move on to the feet.  For this you want to flatten the marshmallow to an oval shape of feet with your finger tip. Then, cut in half and place the sticky side of the marshmallow down on your wax paper.  Keep the feet pair together, later you will paint the toes with food color. (Do a pair for each bunny tail you are making, with a few extra for safe measure).

The last marshmallow piece you're going to make is the ears.  For this you will need a shallow bowl or plate to pour some pink sanding sugar.  Flatten your marshmallow; you want these to be flatter than the feet, cut them in half placing the sticky side into the pink sanding sugar for the inner bunny ear.  Place ear pairs with sanding sugar up to dry.  (Do a pair for each bunny tail you are making).


Now go back to your bunny feet, you will need your pink or red food coloring and food safe brush.  I found it was easier to have a few drops of food coloring on the waxed paper and a paper towel to wipe the brush of excess coloring.  Touch the brush tip to the food coloring and for the top of your foot make a large dot of color, not too much or it will bleed color all over the foot.  (This is where the extra feet come in handy).  Below the large dot make four extra small dots for the toes.  Let dry.

(Left feet show how the color can bleed if too much is used.)


The second part is the bunny tail base, you will need a Oreo Thins Cookie Mint for each bunny you make. Also, unwrap the Lindt white Chocolate truffles for each one and also set aside.   Lay out a sheet of wax paper big enough to hold all your cookies and a fork.

Take the shallow microwavable bowl and melt the green candy melts in the microwave in 10 second intervals, stirring until completely melted.  Now take an Oreo and a fork in hand and submerge the cookie in the melted candy melts cover both sides of the cookie and using the fork lift the cookie out and place on wax paper.  Do this for each bunny you are making.  While the chocolate is still soft place a Lindt truffle in the center of each cookie base, this will be the bunny bum.


Once each base has a bunny bum, use a toothpick and apply candy melt to the back/sticky side of the bunny tail and attach the tail slightly off the top center of each bunny rump.  Then move on to the feet, take a pair of feet with the toes side to the bottom of each base and using a toothpick apply a little bit of melted candy melts to the sticky side of the foot.  Place the foot on a slight angle against the bunny bum just below the tail.


Once the bottoms and feet are done move on to the ears.  For these, the sanding sugar will face out to either side of the bunny.  This will give the impression that the bunny is reaching into his bunny den for his stash of carrots with his tail in the air.  Follow the same process to attach the ears to the top of the bunny as you did for the feet.


Don't worry if the feet or ears or tail are not center, no two bunnies are ever the same. Unless they are twins, that is.  Now you can stop here or make a batch of green royal icing and a decorator's bag and garb a grass tip.  Take your grass tip and pipe around the bunny.  You can add an egg or pre-made flowers beside the bunnies to give it a more festive look.


Let me know your Bunny Tail Treats tips.

Our table.

Bunny Meadow Cakes


These easy-to-make cakes are simple and fun to make for the busy mom or dad, and not too complicated for little hands to do with some supervision.


  • You'll need:

  • Little Debbie Easter Basket Cakes (10 cakes per box)
  • Kraft Jet-Puffed Bunny Mallow Marshmallow (10 oz. bag)
  • Nestle Toll House White Morsels (12 oz. bag)
  • Hershey's Resse's Mini Eggs or Whoppers Mini Robin Eggs
  • Wilton Foodwriter Pens
  • cookie sheet
  • 2 small Ramekin bowls
  • Parchment or Wax paper
Take your Foodwriter pens and add faces and ears to your Mallow Bunnies. Set aside on a cookie sheet-lined with wax or parchment paper - to dry. Place your mini eggs in a ramekin bowl, open your Easter Basket Cakes and set aside. Melt 1/4 cup of White Morsels in a small microwave-safe ramekin bowl, (increments of 20 to 30 seconds) stir until melted. Take your Bunny Mallows and dip the very bottoms into your melted morsels and attach to your Easter Basket Cakes. Remember to leave room for a mini egg or two. Now, dip just a tip of your mini egg into the melted morsels and attach to your Easter Basket Cake. Let stand until your melted morsels have hardened about 5 to 10 minutes.


Voila you've got your very own Bunny Meadow!

Notes:
Depending on how many mini eggs and Little Debbie Easter Basket Cake boxes you purchase, you can get about 30 to 40 Bunny Meadows. For 20 cakes (2 Boxes), I found all these food items on sale, coming in under $8.00. I already had the Wilton Foodwriters Pens which cost around $4.99 to $8.99 depending on if you have a coupon.


Fall Harvest Roasted Beet Hummus

  I hope your summer has been enjoyable.  I got a late start on my garden this year. I'm getting some vegetables coming in now.   I was ...